Views: 0 Author: Site Editor Publish Time: 2026-08-03 Origin: Site


While the rubber body of a marine fender boasts a very long lifespan, catastrophic system failures rarely start there. They typically originate in the accessory hardware. Anchors, chains, and bolts bear immense dynamic forces during vessel berthing. Undetected fatigue in these crucial components leads directly to vessel damage. You face severe berth downtime and massive liability risks if a fixing snaps under load. We wrote this guide to provide a structured, engineering-backed protocol for inspecting fixing hardware. Our main goal is simple. We want to help you ensure complete structural integrity across your marine infrastructure. You will learn how to maintain strict PIANC compliance while extending system longevity safely. We detail precise inspection methods, wear thresholds, and hardware replacement criteria. This approach keeps your port operating safely and efficiently. You can prevent disastrous accidents by following these exact inspection protocols.
Hardware fatigue—not rubber degradation—is the primary cause of marine fender system failure.
Routine inspections must target galvanic corrosion, torque loss, and mechanical wear, particularly on high-load Super Cone Fender installations.
Anchor chain links exhibiting more than a 10% reduction in diameter require immediate replacement to maintain safety factors.
Evaluating replacement fixings requires matching material grades (e.g., HDG or stainless steel) to the specific environmental and sheer load requirements of the terminal.
Deferred maintenance carries a massive hidden cost. Port operators often ignore fixing hardware until a catastrophic failure forces a berth closure. Emergency repairs require expensive rush orders for custom steel components. Unplanned berth downtime also means lost revenue and delayed shipping schedules. Scheduled hardware replacements cost a fraction of these emergency repairs. You protect your entire terminal operation by adopting a proactive inspection routine.
Your main success metric is achieving zero unplanned downtime. You extend the lifecycle of the entire fender system when you maintain the hardware correctly. A well-maintained cone fender system distributes impact energy flawlessly. Broken chains or loose anchors force the rubber body to absorb unnatural shear forces. This accelerates rubber degradation and invalidates system warranties.
Aligning your inspection routines with PIANC guidelines ensures industry compliance. Marine insurance providers often demand documented proof of these inspections. You face higher premiums or denied claims if you lack standard maintenance records. Authoritative engineering standards dictate strict intervals for checking submerged structures.
We understand the implementation reality is often difficult. Inspecting submerged or partially obscured fixings presents significant challenges. High tides, poor visibility, and hazardous marine environments complicate routine checks. Maintenance teams need standardized reporting templates to track degradation over time. Divers must document every sign of fatigue accurately. Consistent data collection helps you predict failure before it happens.
The structural integrity of your system relies heavily on cast-in embedments. Anchors secure the heavy rubber unit to the concrete pier. You must identify visual stress indicators early. Concrete spalling around the anchor points serves as a major warning sign. Micro-cracking often indicates excessive shear forces transferring into the concrete deck. You might also notice rust bleeding from the embedment area. This rust signifies internal anchor corrosion degrading the steel structure.
Pull-out risk assessment requires careful physical examination. You must check for any visible gaps between the concrete face and the anchor flange. Even a millimeter of separation compromises the holding power. Cyclic berthing impacts naturally pull on these anchors. They slowly work themselves loose if the original installation lacked proper epoxy sealing. Ensure your maintenance divers physically probe these gaps during routine checks.
Environmental degradation accelerates specifically at the splash zone. Oxidation happens much faster here due to continuous wet-and-dry cycles. You must assess the rate of corrosion carefully. Pitting on the steel surface drastically reduces the load-bearing capacity of your anchors. Saltwater easily penetrates compromised galvanized coatings.
Clear Marine Growth: Scrape away barnacles to expose the actual steel surface before inspection.
Check Torque Marks: Look for broken paint seals indicating the anchor bolt has shifted.
Measure Pitting Depth: Use a specialized depth gauge to evaluate severe rust craters.
Take actionable steps when embedment integrity remains questionable. Non-destructive testing (NDT) becomes essential for critical infrastructure. Ultrasonic testing can detect internal voids or metal fatigue inside the anchor shaft. Pull-tests can verify the exact holding force remaining in aging embedments. These advanced methods remove the guesswork from your maintenance program.
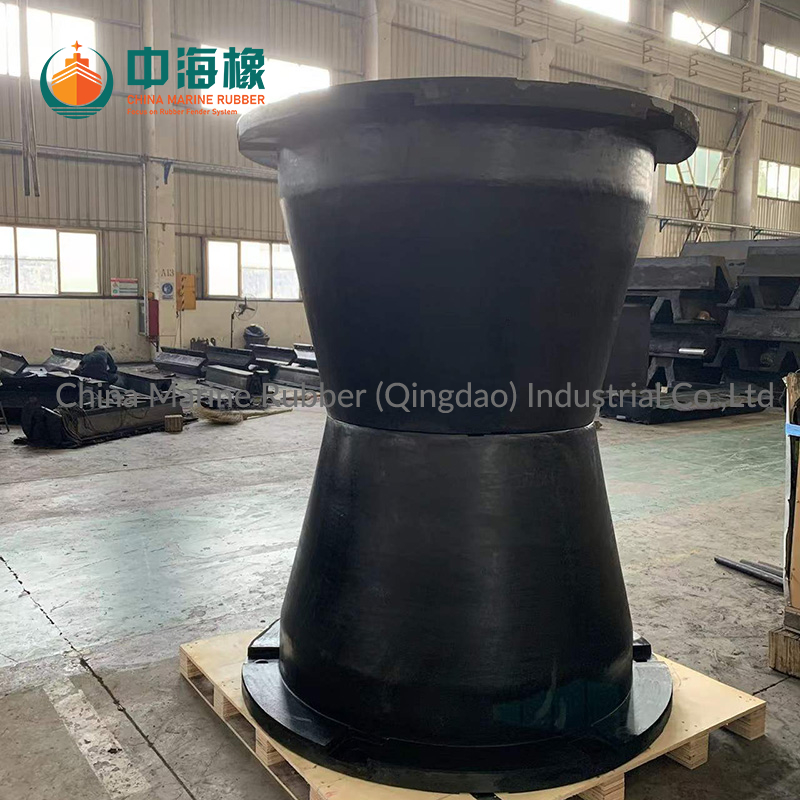
A high-capacity Super Cone Fender relies on a complex chain network. You must differentiate between their specific functions during an inspection. Each chain handles a distinct type of force.
Tension Chains: These prevent the rubber cone from over-compressing during severe impacts. They act as the ultimate stopping mechanism.
Shear Chains: These handle lateral vessel movement. They prevent the frontal panel from tearing the cone sideways.
Weight Chains: These support the massive steel frontal panels. They prevent the panel from sagging and distorting the rubber body below.
Measuring mechanical wear requires strict protocols. You cannot rely on visual estimates. Standard protocol demands using a digital caliper. You must measure the inter-link contact points where metal grinds against metal. This friction causes the most severe material loss.
Identifying the critical replacement threshold is non-negotiable. Industry standards mandate chain replacement upon reaching a 10% material loss. If a 40mm chain link wears down to 36mm, it loses significant tensile strength. You risk catastrophic failure if you ignore this 10% rule. Document every measurement carefully to track the degradation rate.
Shackle and U-bracket scrutiny forms another critical inspection layer. Shackles connect the heavy chains to the concrete anchors and frontal panels. Check every pin for microscopic distortion. Ensure no cotter pins are missing or severely rusted. Look closely for asymmetrical wear patterns inside the U-bracket. Uneven wear indicates a misaligned fender system pulling improperly.
Risk mitigation requires looking past surface-level issues. Relying solely on visual rust is insufficient. Surface rust often looks terrible but rarely impacts structural strength immediately. You must prioritize mechanical elongation instead. A chain stretches under extreme tension before it snaps. Look for elongated links or pinched shapes. Structural deformation presents a much higher danger than standard surface oxidation.
The threat of galvanic corrosion destroys fender hardware silently. This electrochemical reaction occurs between dissimilar metals. The cone fender flange, steel bolts, and frontal panels often use different steel grades. Seawater acts as an efficient electrolyte connecting them. One metal sacrifices itself and corrodes rapidly. You must check for missing or degraded isolation sleeves. These sleeves prevent direct metal-to-metal contact.
Torque verification remains a vital part of scheduled maintenance. Hardware settling is a harsh reality. The thick rubber body compresses slightly over its first few months of active use. This compression creates slack in the fastening system. Post-installation re-torquing is absolutely critical. Do not skip this step.
Your inspection protocol requires a heavy-duty, calibrated torque wrench. You must test for loosened nuts caused by cyclical impact loads. Berthing vessels send massive vibrations through the concrete. These vibrations slowly back the nuts off the anchor threads. Test every single bolt according to the manufacturer specification sheet.
Thread integrity directly affects yield stress limits. You must inspect the exposed threads for any signs of stretching. Stretched threads indicate the bolt absorbed forces beyond its design capacity. Look for sheared heads on smaller anchor bolts. A sheared bolt head transfers dangerous loads to the neighboring hardware.
Washer degradation provides excellent clues about load distribution. Check carefully for cracked or physically deformed washers. A cupped washer indicates someone over-torqued the bolt. A cracked washer usually means uneven load distribution across the rubber flange. Replace damaged washers immediately to restore proper clamping force.
Component Area | Primary Inspection Focus | Warning Signs | Required Action |
|---|---|---|---|
Anchor Bolt Threads | Thread pitch and integrity | Stretching, stripping, deep pitting | Replace bolt entirely |
Hex Nuts | Torque retention | Loose fit, backed-off position | Re-torque to spec, check rubber |
Isolation Washers | Galvanic separation | Cracks, missing nylon/teflon layers | Install new isolation kit |
Steel Washers | Load distribution | Cupping, severe deformation | Replace and check flange level |
Port maintenance teams must choose between spot-treatments and full replacements. We categorize solutions based on the severity of the damage. Spot-treating works well for minor surface rust. You can clean the affected area using wire brushes and apply marine-grade epoxy coatings. Complete hardware changeout becomes necessary when components hit mechanical wear limits. Never attempt to weld or patch a load-bearing marine chain.
Evaluating suppliers requires strict procurement lenses. Material traceability separates reliable vendors from dangerous ones. You must demand actual mill certificates for any high-tensile bolts. Always verify Grade 8.8 or Grade 10.9 specifications on paper. The same strict rule applies to procurement of heavy marine chains. Counterfeit steel causes fatal accidents in marine environments.
Coating standards dictate the lifespan of your replacement parts. Evaluate the Hot-Dip Galvanized (HDG) thickness carefully. Harsh marine environments destroy thin zinc coatings in months. Compare the supplier specifications against official ISO standards for HDG thickness. Thicker galvanization delays the onset of saltwater corrosion significantly.
Apply sound logic when shortlisting hardware suppliers. Choose the Original Equipment Manufacturer (OEM) or highly vetted B2B suppliers. Generic hardware providers rarely understand the sheer loads generated by a Cone Fender. OEM parts ensure exact system compatibility. They match the original thread pitches, steel grades, and tension ratings perfectly.
Your next steps require immediate action. Initiate a comprehensive hardware audit across your facility. Document the current condition of every chain and bolt. Build a localized spare parts inventory for your most critical berths. Stocking essential shackles, chains, and bolts onsite prevents lengthy berth closures during unexpected emergencies.
Strict, scheduled inspection routines guarantee the survival of your marine infrastructure. You cannot ignore anchors, chains, or embedments just because they sit underwater. A robust fender system is truly only as strong as its weakest bolt or chain link. Routine caliper measurements, torque verification, and rust assessment prevent minor wear from becoming a catastrophic failure.
Take action today to protect your port assets. Schedule a dive team to evaluate your cast-in embedments and splash zone hardware. Replace any chain link showing more than a 10% diameter reduction immediately. Keep complete maintenance records to satisfy PIANC and insurance requirements.
Contact our technical sales team to schedule a professional accessory audit. We offer detailed hardware replacement consultations tailored to your specific terminal conditions. You can also reach out to request a comprehensive maintenance manual for your specific fender models.
A: Perform post-storm checks immediately after severe weather events or abnormal vessel impacts. Conduct basic visual inspections quarterly to spot obvious rust, loose nuts, or missing cotter pins. Execute a comprehensive audit annually. This annual check must include diver inspections, caliper measurements of chains, and precise torque verification on all anchor bolts.
A: The industry standard rule dictates a strict 10% diameter reduction limit. If a chain link loses 10% of its original steel thickness due to mechanical wear or severe corrosion, you must replace it immediately. Operating beyond this limit drastically reduces the safe working load and invites sudden chain snapping.
A: Bolts lose torque primarily due to rubber compression settling. The thick rubber flange naturally compresses slightly during its first few months of use. Cyclical vessel impacts also send strong vibrations through the structure, slowly backing the nuts off. Thermal expansion and contraction further contribute to minor torque loss over time.
A: You should avoid mixing them directly. Mixing stainless steel and galvanized carbon steel creates a high risk of galvanic corrosion in saltwater. The galvanized steel acts as an anode and will corrode rapidly. If you must mix materials, you must install specialized dielectric isolation sleeves and washers to separate the metals.