Views: 0 Author: Site Editor Publish Time: 2025-11-28 Origin: Site


Have you ever wondered how to cut a rubber fender to ensure a perfect fit? A poorly cut fender can result in wasted material and poor performance.
Rubber fenders play a crucial role in protecting valuable equipment from impact damage. However, getting the size and shape right is vital for their function and longevity. In this guide, we will discuss how to cut rubber fenders properly, ensuring they fit securely, perform well, and enhance the overall installation.

Improper cuts lead to wasted rubber, which is costly and inefficient. For example, when a fender is cut incorrectly, it may create unusable pieces, which adds to both material costs and delays. Rubber fenders are designed to absorb impacts and protect infrastructure, such as boats, docks, and trucks. When the fender is cut improperly, it may not fit as intended, leading to gaps that reduce its protective capabilities.
A poorly cut fender also increases the risk of damaging the equipment it is meant to protect. Whether it's a boat or a dock, the structure could be damaged if the rubber fender isn't installed correctly. Therefore, ensuring precise cutting is crucial for both cost-efficiency and the long-term functionality of the rubber fender.
For a rubber fender to do its job effectively, it must fit perfectly. A fender that is cut accurately will fit securely into the designated space, ensuring its ability to absorb impacts and protect surfaces from damage. Conversely, inaccurate cuts can lead to an improper fit, creating gaps that compromise the fender's ability to provide proper cushioning.
Proper installation is also essential for the fender's longevity. A well-fitted rubber fender will last longer and maintain its performance, whereas a poorly cut fender may wear out more quickly or fail to provide the necessary protection. Ensuring a precise cut contributes to the overall durability of both the fender and the infrastructure it protects.
In many applications, such as on luxury yachts or high-end docks, rubber fenders are not only functional but also visible. A clean, straight cut contributes to the overall professional appearance of the installation. The visual appeal of a rubber fender matters, especially when it is prominently displayed on a boat or dock. A fender that is cut accurately, with smooth edges, will look neat and polished, adding to the quality and overall aesthetic of the project.
Additionally, a professional appearance enhances client satisfaction, especially when rubber fenders are used in high-profile projects. Ensuring neat, precise cuts is not only about function but also about making the installation look its best.
The type of tool you choose depends on the thickness and flexibility of the rubber fender. For thinner, more flexible rubber fenders, a sharp utility knife will typically suffice. A utility knife offers precision and control, allowing for clean, straight cuts. However, for thicker, denser rubber fenders, a fine-toothed saw or a powered miter saw is recommended.
Using the right tool ensures that the rubber is cut smoothly and precisely, preventing tearing or fraying. An incorrect tool could result in jagged cuts or damage to the rubber, which could affect the fender's fit and performance.
Utility Knife: Ideal for cutting thinner, flexible rubber fenders. Make sure the blade is sharp to ensure a clean cut.
Fine-Toothed Saw: Works best for cutting thicker, more rigid rubber fenders. This saw minimizes damage and reduces force during cutting.
Power Saws: For large, thick rubber fenders, a powered miter saw or jigsaw can be used. Always ensure the blade is suitable for rubber to prevent tearing or melting the material.
Before cutting, ensure you have a stable, flat work surface. A cutting table or workbench is essential for preventing the rubber from shifting during the cutting process. If the rubber moves while you're cutting, it can lead to inaccurate measurements or uneven cuts, resulting in a poor fit when the fender is installed.
To ensure the rubber stays in place, secure it with clamps or weights. This helps stabilize the fender, allowing you to make precise, accurate cuts. The more stable the fender, the easier it will be to control the cut, resulting in better quality and a smoother finish.
Cutting rubber fenders, particularly with sharp tools or power equipment, can expose you to safety risks. Protective gloves are essential to protect your hands from sharp edges and rough surfaces. Gloves also provide a better grip and ensure better control over the cutting process.
Additionally, always wear safety goggles to protect your eyes from flying rubber debris or particles that may result from the cutting process. By wearing appropriate safety gear, you can reduce the risk of injury and make the cutting process safer.
Note: Always use the proper safety equipment, including gloves and goggles, to ensure your safety during the cutting process.
| Tool Type | Best For | Description |
|---|---|---|
| Utility Knife | Thin, Flexible Rubber Fenders | Sharp blade ideal for clean, controlled cuts. |
| Fine-Toothed Saw | Thick Rubber Fenders | Works well for dense rubber without excessive force. |
| Power Saws | Large, Thick Rubber Fenders | Miter saw or jigsaw for heavy-duty cutting tasks. |
| Clamps or Weights | Securing Rubber Fenders | Holds the rubber steady for accurate cuts. |
| Safety Gear (Gloves, Goggles) | General Safety | Protects hands and eyes during the cutting process |
Accurate measurements are essential for achieving a precise cut. Before cutting, use a tape measure to determine the exact length you need, and mark the cutting line clearly using a marker or chalk. Double-check the measurements to ensure accuracy before cutting. A small miscalculation at this stage could lead to wasted material and a poor fit for the fender.
For straight cuts, use a ruler or measuring tape to guide the marking process. A clear, straight line will help you cut more accurately, reducing the risk of errors. Taking your time with this step will ensure the best results.
Securing the rubber fender before cutting is crucial to achieving a clean, accurate cut. Use clamps to secure the fender to your work surface, ensuring it doesn't move while you're cutting. This will prevent inaccuracies and reduce the likelihood of damaging the fender.
If you are working with a large fender, having another person to help stabilize the material can be beneficial. A secure fender ensures better control during the cutting process, resulting in a more accurate, professional cut.
The technique you use will depend on the rubber's thickness and the complexity of the cut. For thinner, softer rubber, a utility knife will suffice, but for thicker materials, a saw or power tool will be necessary. Always cut slowly and steadily to avoid jagged edges or uneven cuts.
When using a power saw, ensure that the blade is designed specifically for cutting rubber. This will prevent excessive friction or heat buildup, which could cause the rubber to melt or become damaged. Avoid applying too much pressure when cutting, as this can also result in uneven cuts.
| Rubber Type | Recommended Cutting Tool | Best Cutting Technique | Notes |
|---|---|---|---|
| Soft Rubber | Utility Knife | Slow, steady slicing | Ideal for thinner, flexible rubber materials. |
| Thick Rubber | Fine-Toothed Saw | Use moderate speed to avoid fraying | Suitable for dense rubber that requires more force. |
| Very Thick Rubber | Power Saw (Miter/Jigsaw) | Slow, controlled cutting | Best for large, thick rubber fenders. |
| Cold or Stiff Rubber | Heat Gun + Utility Knife or Saw | Warm the rubber before cutting | Softening rubber makes cutting easier. |
Once the cut is made, smooth the edges to ensure the fender fits perfectly when installed. Use sandpaper or a fine file to carefully smooth any rough edges. This step is essential for ensuring that the fender will fit snugly without causing damage during installation.
A smooth edge also improves the visual appearance of the fender, especially in applications where the fender is visible. It ensures that the rubber fender fits properly and functions as intended, providing better protection and aesthetics.
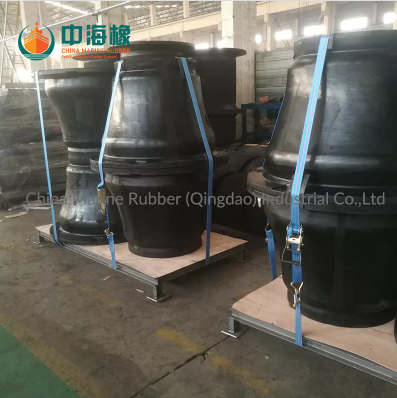
For stiff or cold rubber, a heat gun can be used to soften the material, making it more pliable and easier to cut. Warming the rubber gently will allow you to make smoother, cleaner cuts without causing damage. Be cautious not to overheat the rubber, as excessive heat can cause the material to deform or lose its protective properties.
Using heat is especially beneficial for thicker rubber fenders that are more difficult to cut. It can significantly reduce the effort required for cutting while ensuring a cleaner, more accurate result.
When cutting large or thick rubber fenders, using a power saw like a miter saw or jigsaw is more efficient than using manual tools. These tools allow for quicker, more controlled cuts, especially for thicker materials. Be sure to use a blade specifically designed for rubber to avoid damaging the material.
Power tools are especially useful for large-scale projects or when time is a factor. They provide precision and can handle the stress of cutting through thicker rubber without the same effort required for manual cutting.
If your project requires cutting rubber fenders into complex shapes or angles, it may be necessary to use a template or guide. For intricate cuts, a jigsaw or band saw works best, as these tools provide better control and precision when making curves or angled cuts.
Using a guide or template helps ensure that the cuts are accurate and prevents mistakes that could ruin the fender or cause it to fit improperly.
A dull blade is one of the most common causes of poor-quality cuts when working with rubber fenders. It can cause the blade to drag through the material instead of slicing cleanly, which leads to uneven edges and fraying. This can make the fender look unprofessional and may even affect its performance if the cut edges don't fit properly during installation.
Before starting the cutting process, always check the sharpness of your blade. If the blade feels dull or begins to drag, replace it immediately. A fresh, sharp blade ensures that the cut is smooth and precise. If frayed edges do appear after cutting, use sandpaper or a fine file to smooth them out. This not only improves the visual appeal but also ensures that the fender fits securely, without any rough edges that might cause issues during installation.
Consistency and accuracy are key when cutting rubber fenders to ensure they fit properly and perform well. To achieve this, start by measuring and marking the fender carefully. Double-check your measurements to make sure everything is correct before you make any cuts.
When cutting, maintain a steady hand and use a slow, controlled motion. Rushing can lead to mistakes, resulting in uneven cuts or a fender that doesn't fit as intended. If necessary, use a ruler, measuring tape, or cutting guide to ensure that the lines are straight and the cut is aligned with your markings. This extra step can help prevent errors and ensure that the fender is cut exactly to the required size.
Rubber fenders come in different thicknesses and compositions, and each type may require a different cutting approach. Softer rubber can be easily cut with a sharp utility knife, which allows for precise, clean cuts. However, for thicker or denser rubber fenders, a saw or power tool is often necessary to achieve the right result.
Thicker rubber may require more force to cut, and using the wrong tool can lead to jagged edges or uneven cuts. It's important to test your cutting method on a small sample of the rubber before cutting the entire fender. This helps you gauge the best approach and avoid wasting material. By understanding the unique properties of each rubber type and using the right tools, you can ensure clean, accurate cuts every time.
Tip: Different rubber types require different cutting methods. Test on a small sample before cutting the entire fender to avoid material waste.
| Issue | Cause | Solution |
|---|---|---|
| Dull Blades | Blade has worn out from repeated use | Replace the blade with a sharp one before cutting. |
| Frayed Edges | Cutting too quickly or using a dull blade | Use sandpaper or a fine file to smooth the edges. |
| Uneven Cuts | Rubber not secured properly during cutting | Clamp the fender securely to a stable surface. |
| Inaccurate Measurements | Misaligned measuring or marked lines | Double-check measurements before cutting. |
Cutting rubber fenders may seem straightforward, but achieving precise, clean cuts requires the right tools, techniques, and safety practices. By following the steps outlined above and using the appropriate tools for the job, you can ensure that your rubber fender fits perfectly, performs well, and adds to the aesthetic of your installation.
For high-quality rubber fenders, consider exploring the products offered by China Marine Rubber. Their rubber fenders are designed to provide optimal protection, durability, and aesthetic appeal for various applications. With a focus on customer satisfaction, China Marine Rubber ensures that each product meets industry standards, offering long-lasting performance and value.
A: A rubber fender is a protective component used to absorb impacts and prevent damage to boats, docks, trucks, and other structures. It provides cushioning during collisions, ensuring long-term durability of the infrastructure.
A: To cut a rubber fender, first measure and mark the desired length, secure it on a stable surface, and use a sharp utility knife or saw. Always use a slow, controlled motion for clean, accurate cuts.
A: Yes, cutting rubber fenders at home is possible with the right tools, such as a utility knife for thinner rubber or a saw for thicker types. Ensure you have proper safety gear and a steady work surface.
A: A sharp blade ensures clean, precise cuts without fraying or damaging the rubber fender. Dull blades can cause uneven edges, resulting in poor-fitting fenders that affect performance.
A: A utility knife works well for soft, flexible rubber fenders, while a fine-toothed saw or power saw is recommended for thicker, denser materials. Choose the tool based on the rubber's thickness and flexibility.
A: After cutting, use sandpaper or a fine file to smooth any rough or frayed edges. This ensures a clean, professional finish and allows the fender to fit properly without causing damage during installation.